Homemade Bubble Gum
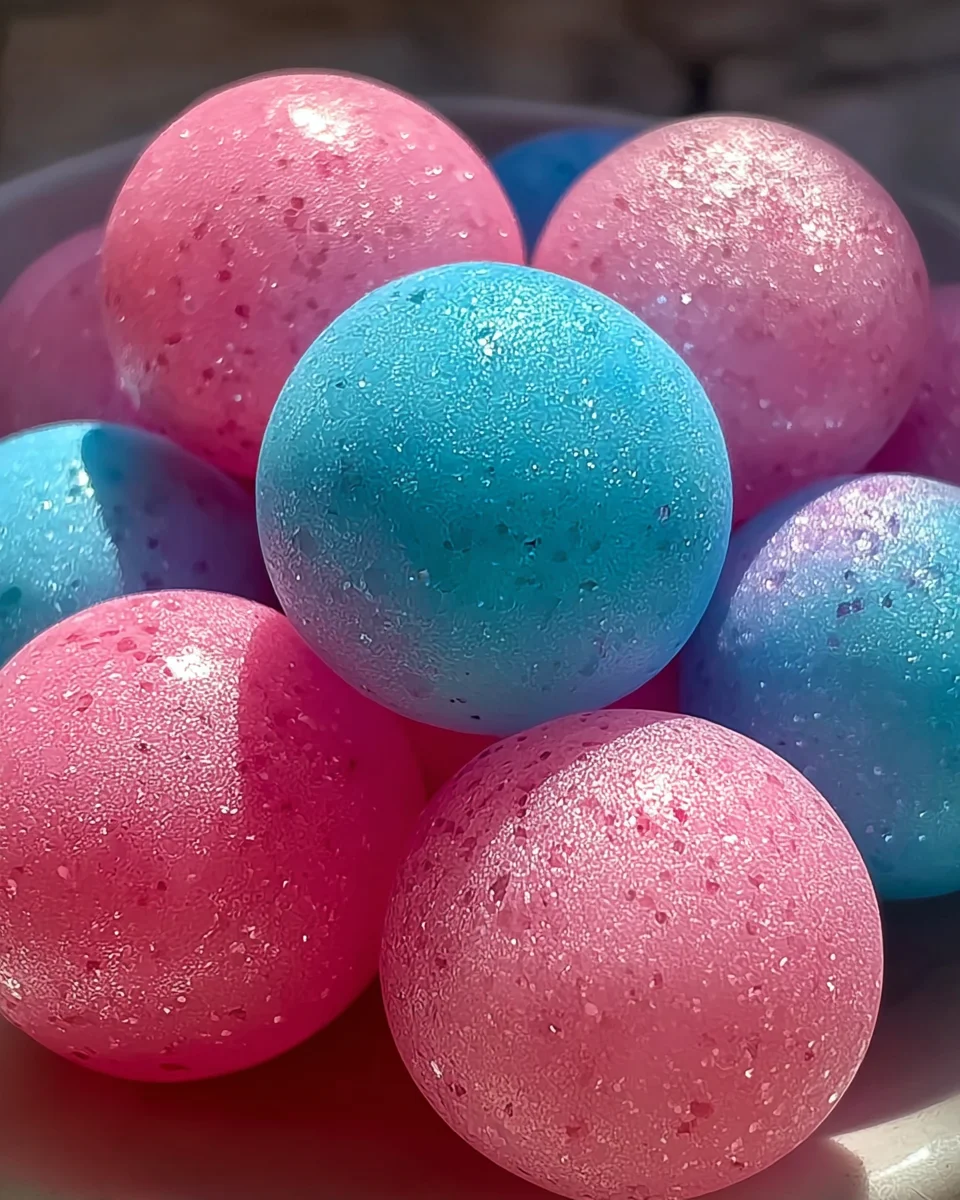
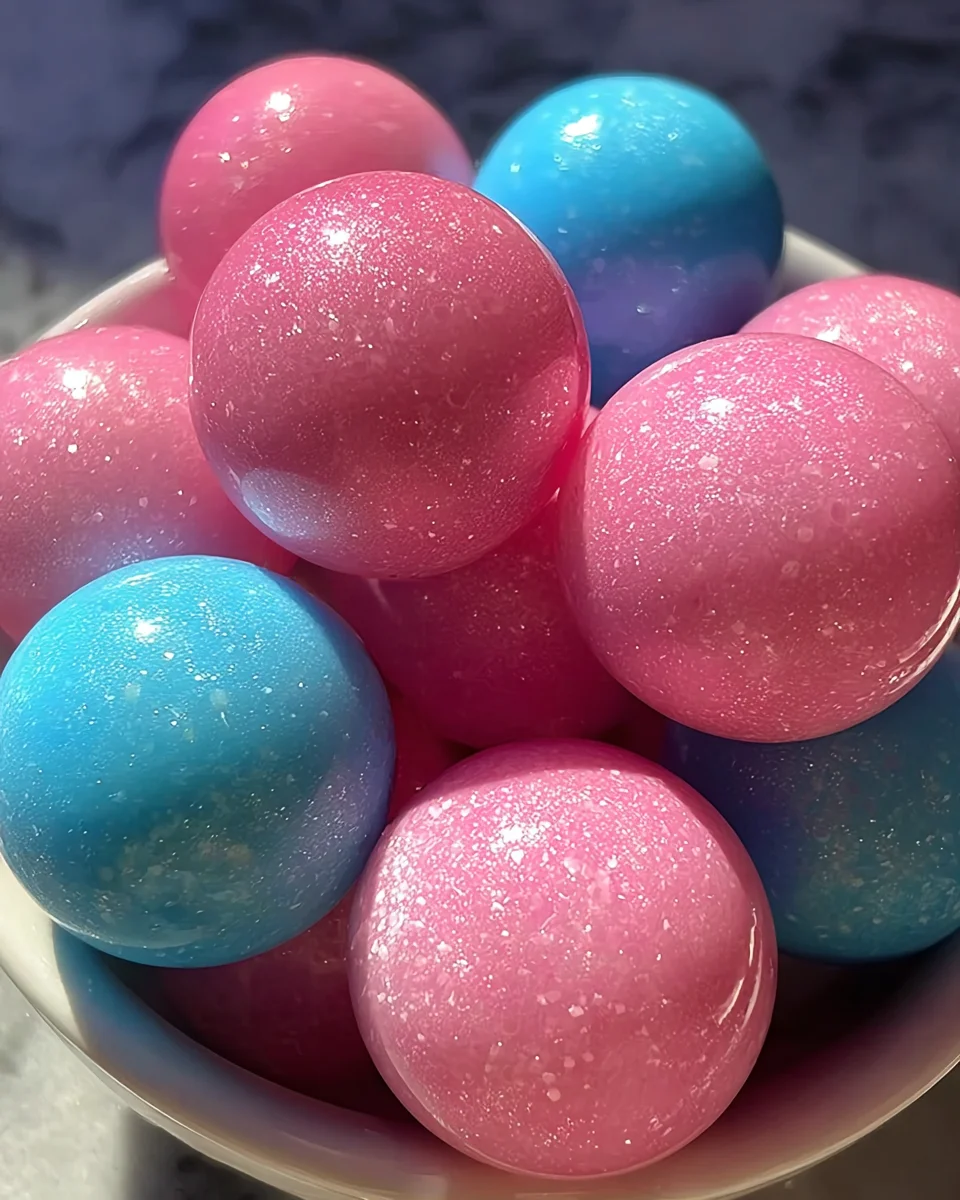
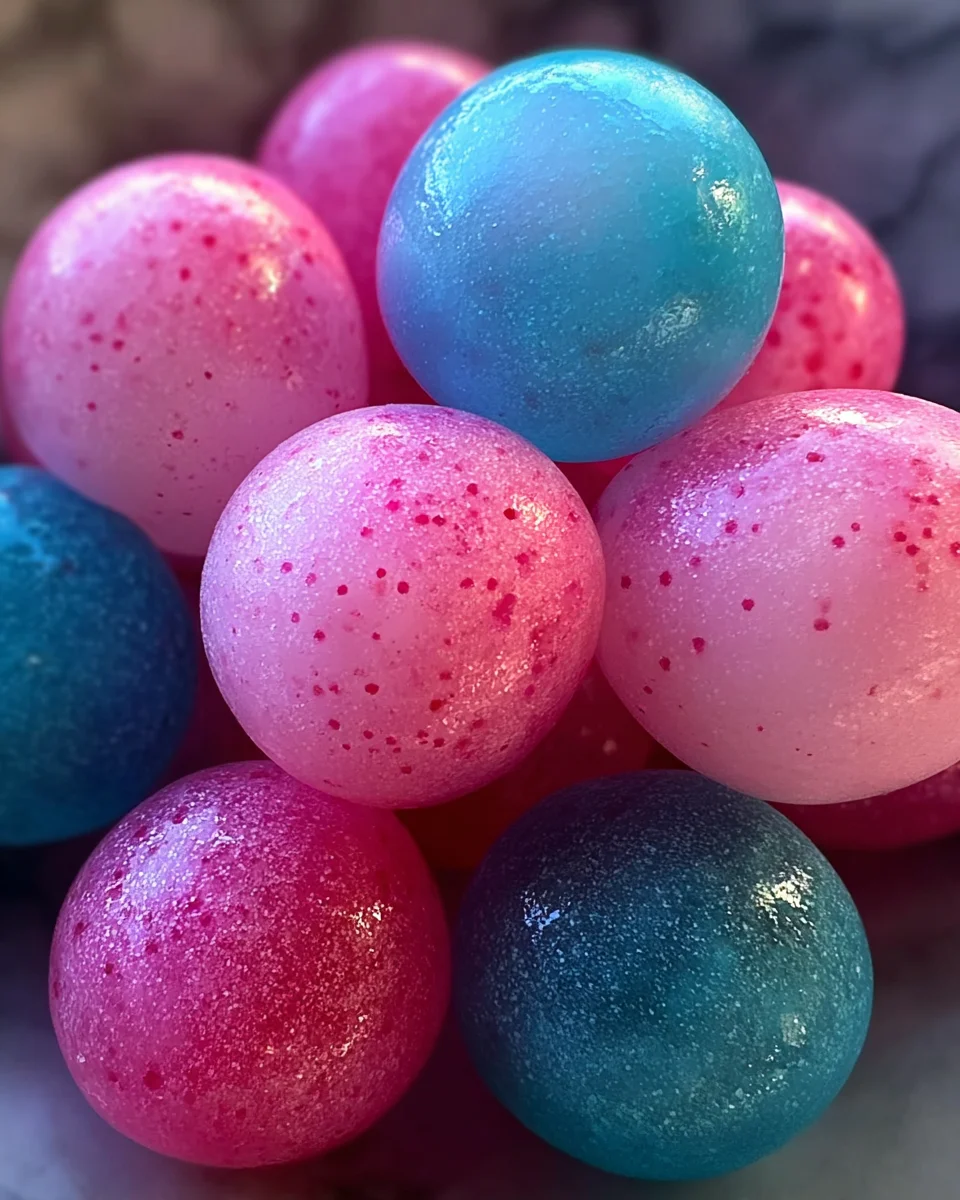
Make your own Homemade Bubble Gum with this fun and easy recipe! Perfect for kids’ parties, playdates, or just a delightful treat at home, this bubble gum is customizable with your favorite flavors and colors. You’ll enjoy creating a unique candy experience that’s sure to impress friends and family alike.
Why You’ll Love This Recipe
- Easy to Make: With simple ingredients and straightforward steps, you’ll have delicious bubble gum ready in no time.
- Customizable Flavors: Choose from a variety of flavoring oils to create your perfect taste sensation.
- Fun Activity for Kids: Involve the little ones in candy making for an engaging and educational experience.
- Great for Any Occasion: Whether it’s a birthday or just a rainy day, homemade gum makes every moment special.
- Satisfying Chew: Enjoy the perfect balance of chewiness and sweetness that will keep you coming back for more.
Tools and Preparation
Before diving into making your Homemade Bubble Gum, gather your tools for a smooth process.
Essential Tools and Equipment
- Microwave-safe bowl
- Spoon or spatula
- Measuring cups
- Measuring spoons
- Wax paper or silicone mat
Importance of Each Tool
- Microwave-safe bowl: Essential for melting the gum base evenly without burning it.
- Spoon or spatula: Handy for mixing ingredients thoroughly to achieve the right consistency.
- Measuring cups: Precise measurements ensure that your bubble gum turns out perfectly every time.
- Wax paper or silicone mat: Keeps your finished gum from sticking to surfaces as it cools.
Ingredients
Make your own customizable bubble gum at home using gum base and simple ingredients. Add your favorite flavors and colors.
For the Base
- 1/3 cup gum base
- ¼ cup corn syrup
For the Sweetness
- 3 tablespoons powdered sugar
- 3 tablespoons gum powder
For Flavoring
- ¼ teaspoon citric acid
- Food coloring as desired
- Flavoring oil as desired
How to Make Homemade Bubble Gum
Step 1: Melt the Gum Base
Heat the gum base in a microwave-safe bowl. Use 30-second intervals to melt it completely, stirring between sets to ensure even melting.
Step 2: Combine Ingredients
Once melted, stir in the corn syrup. Mix well until fully combined, creating a smooth blend.
Step 3: Add Color and Flavor
Mix in food coloring and flavoring oil according to your preferences. Stir until evenly distributed throughout the mixture.
Step 4: Incorporate Sugar
Gradually work in the powdered sugar. Continue mixing until the mixture is no longer sticky and has formed a pliable dough.
Step 5: Shape Your Gum
Form the mixture into balls or strips. For an added twist, consider incorporating citric acid for a sour flavor!
Step 6: Let It Set
Allow your homemade bubble gum to sit for about 30 minutes until firm. This helps enhance its chewiness.
Now you’re ready to enjoy your very own Homemade Bubble Gum, perfect for sharing or keeping all to yourself!
How to Serve Homemade Bubble Gum
Homemade bubble gum can be a fun treat to enjoy at parties, events, or just as a sweet snack. Here are some creative serving suggestions to make the most of your homemade creation.
For Kids’ Parties
- Colorful Plates: Serve your bubble gum on vibrant plates that match the occasion’s theme.
- Bubble Gum Bar: Create a station where kids can pick their favorite flavors and colors of bubble gum.
As Party Favors
- Gift Bags: Package pieces of bubble gum in small bags with colorful ribbons for guests to take home.
- Custom Labels: Personalize labels for each bag with fun messages or the event date.
In Snack Boxes
- Snack Packs: Include pieces of homemade bubble gum in snack boxes alongside other treats like popcorn and candy.
- Themed Boxes: Create themed snack boxes for holidays or birthdays featuring various flavors of bubble gum.
During Family Game Night
- Bubble Blowing Contest: Encourage family members to blow the biggest bubbles while enjoying their homemade gum.
- Prize for Winners: Offer a small prize for the best bubble blower to make it more competitive and entertaining.
How to Perfect Homemade Bubble Gum
Perfecting your homemade bubble gum is all about trial and error. Use these tips to enhance your candy-making experience.
- Boldly Experiment with Flavors: Try different flavoring oils to create unique taste combinations that suit your preferences.
- Carefully Measure Ingredients: Accurate measurements ensure the right texture and flavor balance in your gum.
- Knead Well: Proper kneading helps incorporate all ingredients thoroughly, resulting in a smoother consistency.
- Store Properly: Keep your bubble gum in an airtight container to maintain freshness and prevent it from becoming sticky.
Best Side Dishes for Homemade Bubble Gum
While homemade bubble gum is delightful on its own, pairing it with some fun side dishes can enhance your snacking experience. Here are some great options:
- Fruit Skewers: Colorful fruit skewers add a refreshing contrast to the sweetness of bubble gum.
- Popcorn Flavors: Offer various popcorn flavors like caramel or cheese for a crunchy texture alongside your chewy gum.
- Mini Sandwiches: Bite-sized sandwiches provide savory goodness that balances out the sweetness of the gum.
- Veggie Sticks with Dip: Crisp vegetable sticks paired with ranch or hummus create a healthy snack option for kids and adults alike.
- Jelly Beans: These classic candies complement homemade bubble gum well with their chewy texture and variety of flavors.
- Chocolate-Covered Pretzels: The salty crunch of pretzels coated in chocolate pairs nicely with sweet treats like bubble gum.
Common Mistakes to Avoid
Making Homemade Bubble Gum can be fun, but there are some common pitfalls to watch out for.
- Not melting the gum base properly – Ensure you heat the gum base in short intervals. Overheating can ruin the texture.
- Skipping flavoring – Don’t forget to add your favorite flavoring oil! It’s essential for creating that delicious taste.
- Ignoring the citric acid – If you want sour gum, adding citric acid is a must. Otherwise, your gum will just be sweet.
- Using too much powdered sugar – While it helps with stickiness, too much can make your gum dry. Add gradually until you achieve the right consistency.
- Not letting it rest – Allowing the gum to sit for 30 minutes is crucial for setting. Skipping this step results in sticky, unmanageable gum.
Storage & Reheating Instructions
Refrigerator Storage
- Store in an airtight container to keep it fresh.
- Homemade bubble gum can last up to two weeks in the refrigerator.
Freezing Homemade Bubble Gum
- Wrap individual pieces in plastic wrap before placing them in a freezer bag.
- It can be frozen for up to three months without losing flavor or texture.
Reheating Homemade Bubble Gum
- Oven – Preheat to 250°F and warm for a few minutes; check frequently.
- Microwave – Heat for about 5-10 seconds until slightly soft. Be cautious not to overheat!
- Stovetop – Place in a pan over low heat, stirring occasionally to soften.
Frequently Asked Questions
Here are some common questions about Homemade Bubble Gum and their answers.
Can I use different flavors?
Yes! You can customize your homemade bubble gum with any flavoring oil you like, from fruity to minty options.
How do I make my bubble gum less sticky?
Work in the powdered sugar gradually until the mixture is no longer sticky. This will help improve its texture.
What if I don’t have citric acid?
While citric acid adds a sour kick, you can skip it if you prefer sweet gum. Experiment with other sour ingredients if desired!
How long does homemade bubble gum last?
When stored properly, homemade bubble gum can last up to two weeks in the refrigerator and three months in the freezer.
Final Thoughts
Homemade Bubble Gum is not just a delightful treat but also an enjoyable activity that allows for endless customization. Try different flavors and colors to create your perfect batch! Your kids will love making this fun snack together.
Homemade Bubble Gum
- Total Time: 20 minutes
- Yield: Approximately 10 pieces of bubble gum 1x
Description
Create your very own Homemade Bubble Gum with this simple and fun recipe! Perfect for kids’ parties, playdates, or as a delightful snack at home, making bubble gum is an exciting activity that allows for creativity. Customize your treat with your favorite flavors and colors to impress family and friends. With easy-to-follow steps, you can enjoy a chewy, sweet experience right in your kitchen.
Ingredients
- 1/3 cup gum base
- ¼ cup corn syrup
- 3 tablespoons powdered sugar
- 3 tablespoons gum powder
- ¼ teaspoon citric acid (optional)
- Food coloring (as desired)
- Flavoring oil (as desired)
Instructions
- Melt the gum base in a microwave-safe bowl using 30-second intervals, stirring in between until fully melted.
- Stir in the corn syrup until well combined.
- Mix in food coloring and flavoring oil to achieve your desired taste and color.
- Gradually add powdered sugar while mixing until it forms a pliable dough that is no longer sticky.
- Shape the mixture into balls or strips.
- Let it set for about 30 minutes for optimal chewiness.
- Prep Time: 15 minutes
- Cook Time: 5 minutes
- Category: Dessert
- Method: Microwave
- Cuisine: American
Nutrition
- Serving Size: 1 piece, approximately 10g
- Calories: 35
- Sugar: 8g
- Sodium: 0mg
- Fat: 0g
- Saturated Fat: 0g
- Unsaturated Fat: 0g
- Trans Fat: 0g
- Carbohydrates: 9g
- Fiber: 0g
- Protein: 0g
- Cholesterol: 0mg

